Installing CUCM can be an intensive and uncommon undertaking that a CCNA student is not expected to master. This distinguishes it from preparing a CME router to work with Cisco Configuration Professional, which a student is expected to understand. This difference explains why this lab is in an appendix and why it feels more like a tutorial aimed at just getting the job done.
Lab Topology
We'll set up CUCM in a virtual machine running on an inexpensive Windows PC.
VMWare
Workstation Player is free for non-commercial use and runs under both Windows and Linux.
The Linux option allows you to buy a very inexpensive used laptop online without worrying
about its lack of an OS or even a hard drive. I'll be using the Windows version here.
Our lab topology is shown to the right. The swtich will have voice and data VLANs,
with the router "on a stick" routing between those VLANs and acting as a DHCP server for
the phones and the PC hosting the CUCM virtual machine (the actual CUCM server will have a
separate static IP address). Interestingly, the CUCM server will be on the data VLAN because
it normally handles call signaling, not the kind of audio traffic that would require special
QoS expediting.
Underlying Network Configurations and Services
Communications Manager uses many of the same network services and configurations as
Communications Manager Express, so our router and switch configurations will look much as
they did in Chapter 3. The only major change is that we'll be moving our TFTP server from
the router to CUCM, itself (option 150 in the table, below).
VLAN Configuration and Network Addressing
Our CUCM server will be configured with a static address of 10.0.4.5. This is in the data vlan because CUCM generally deals with signaling traffic rather than the actual audio that requires QoS expediting. The physical computer that hosts the Virtual Machine (VM) containing the CUCM server will automatically receive some unimportant address in the same subnet from the DHCP server.
If you need some extra complexity to accomodate a classroom, feel free to replace the 0 in the second octet with a pod number …and try not to think of your students as pod people.
Table 1. VLAN configuration and network addressing.
VLAN
Subnet
Gateway
DHCP Excluded Addresses
Option 150
3
( VOICE )
10.0.3.0 /24
10.0.3.1
10.0.3.1 - 10.0.3.10
10.0.4.5
4
( DATA )
10.0.4.0 /24
10.0.4.1
10.0.4.1 - 10.0.4.10
Underlying Services
Because we're working in a prototyping environment and protecting the real world from
our experimental traffic, we'll either need to remove dependence on network services or
provide them locally.
Table 2. Network services used by network telephony and our handling of them in a lab environment.
Service
Our Approach
DNS
Remove dependence—One of our first labs will configure CUCM to use IP addresses instead of domain names. This is a best practice anyway; you don't want an unusable phone system just because the DNS server is unreachable.
NTP
Fake It—Manually set the clock on our router and tell it to be an NTP master. We don't really care that our lab timestamps are absolutely correct; we just want to meet CUCM's requirement for an NTP server.
TFTP
Let CUCM handle it—Option 150 in the voice VLAN will point to our CUCM server.
CDP
Take it for granted. Simply use Cisco devices and don't turn it off.
POE
Take it for granted. Buy hardware that provides it and don't turn it off. If necessary, use power adapters on the phones.
Router and Switch Configurations
These configs should get you started. Remember that your interfaces might be called FastEthernet instead of GigabitEthernet and that the actual setting of the clock on your router will need to be done with a command in privileged exec mode (clock set ...), not in the config.
Router Configuration
Switch Configuration
clock timezone PST -8 0
clock summer-time PDT recurring
ntp master 3
! Also set your clock in privileged exec
!
ip dhcp excluded-address 10.0.3.1 10.0.3.10
!
ip dhcp pool VOICE_POOL
 network 10.0.3.0 255.255.255.0
 default-router 10.0.3.1
 option 150 ip 10.0.4.5
!
ip dhcp excluded-address 10.0.4.1 10.0.4.10
!
ip dhcp pool DATA_POOL
 network 10.0.4.0 255.255.255.0
 default-router 10.0.4.1
!
interface GigabitEthernet0/0.3
 description VOICE VLAN
 encapsulation dot1Q 3
 ip address 10.0.3.1 255.255.255.0
!
interface GigabitEthernet0/0.4
 description DATA VLAN
 encapsulation dot1Q 4
 ip address 10.0.4.1 255.255.255.0
clock timezone PST -8
clock summer-time PDT recurring
ntp server 10.0.4.1
!
vtp mode transparent
! Transparent mode stores VLANs in config
!
vlan 3
 name VOICE
!
vlan 4
 name DATA
!
interface FastEthernet0/1
 description Trunk to Router
 switchport trunk encapsulation dot1q
 switchport mode trunk
!
interface range FastEthernet0/2 -24
 switchport access vlan 4
 switchport mode access
 switchport voice vlan 3
 spanning-tree portfast
!
interface Vlan4
 ip address 10.0.4.2 255.255.255.0
 no shut
! This enables IP for NTP
! Without the switch grabbing a DHCP address
Phase 1—Install VMware (Screenshots are clickable)
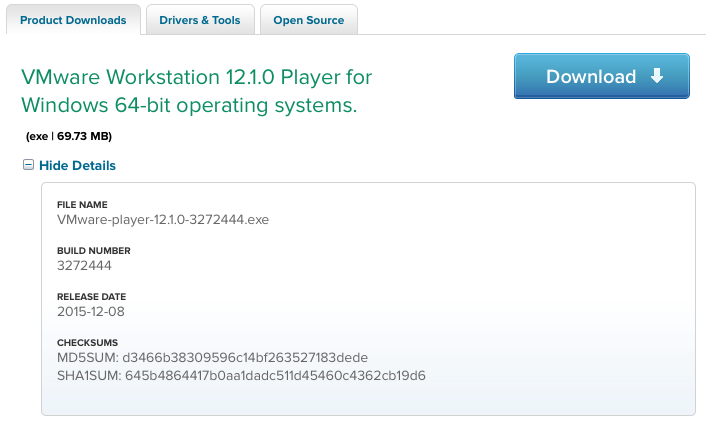
Download VMware Player
The download page tells you what the MD5 hash of the file should be.
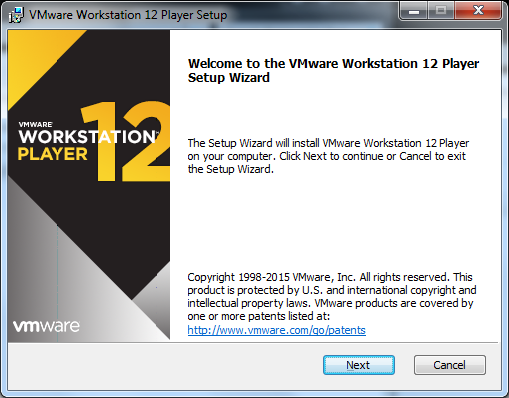
Run the Installer
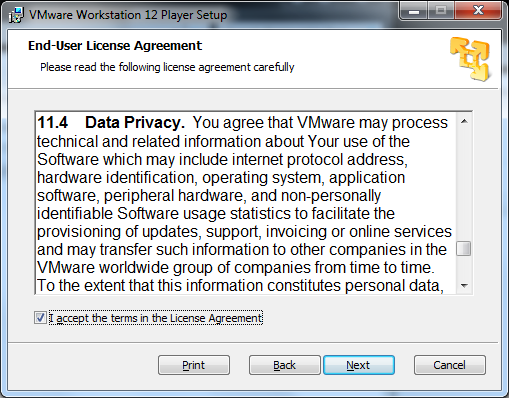
Agree to the License
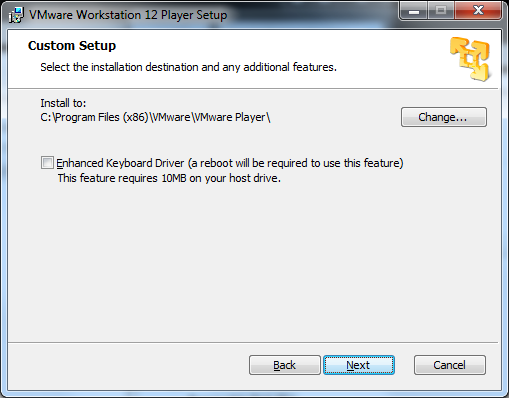
Choose an Install Location
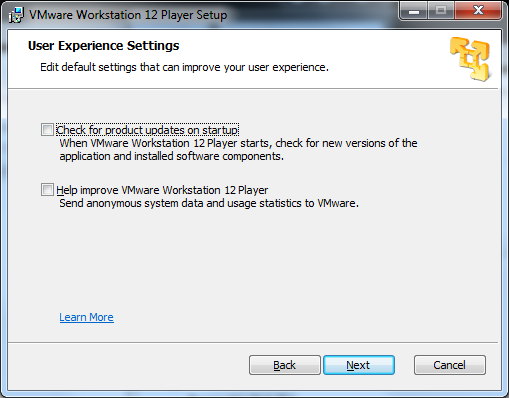
Turn off Update Check
These features use the network, and our PC's connectivity will be limited to
the prototyping lab. Why have startup delays and network warnings when you
don't need them.
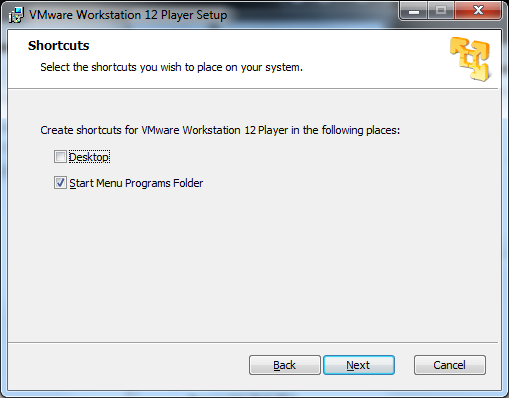
Choose Shortcuts to Create
You can add shortcuts to the start menu and even the desktop.
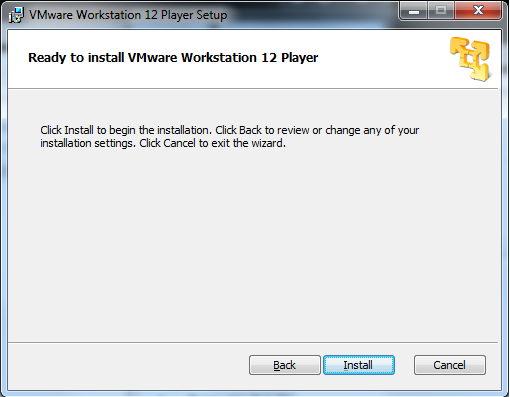
Give a Final OK
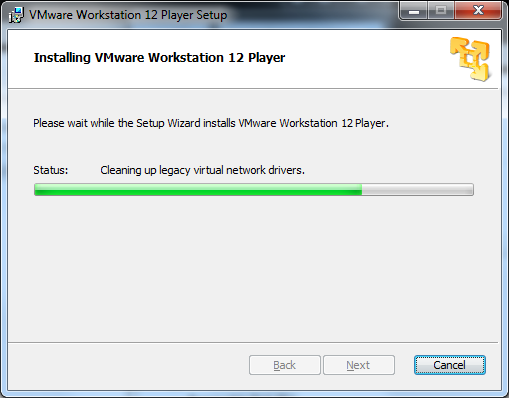
Watch the Install Run
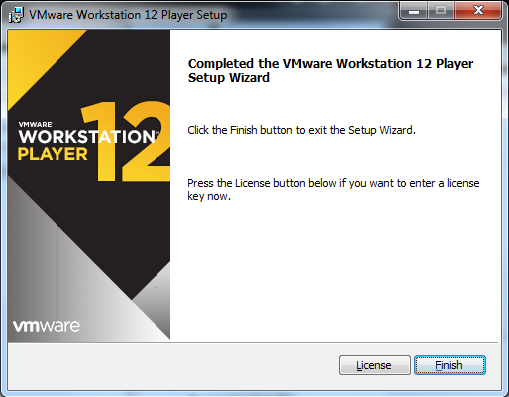
Quit the Installer
Phase 2—Create a Virtual Machine for CUCM
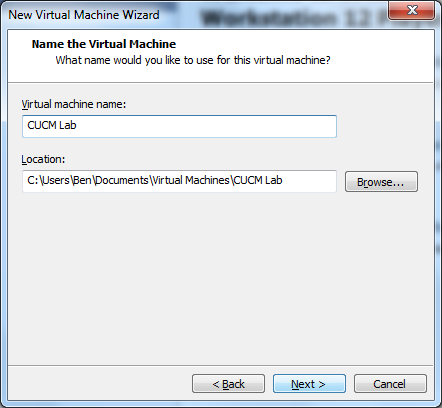
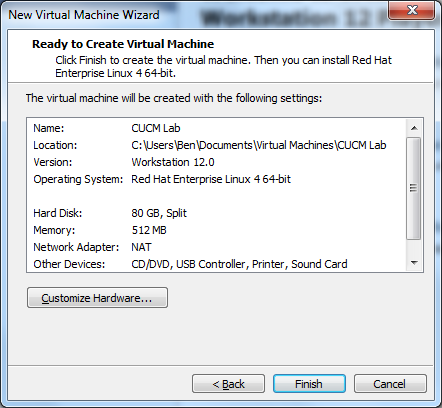
Now that WMware is installed, we will work within that program to create a VM that will hold our CUCM server. We'll give the VM a name, a maximum disk size, a certain number of CPU cores, and acertain amount of the host's RAM. We'll also "bridge" the imaginary network interface, telling the VM to directly use the real ethernet hardware on the host machine, with no translation. One thing to remember about the disk space allocation is that it won't be used unless CUCM actually needs it. This means that your computer doesn't even need to have as much free disk space as you allocate.
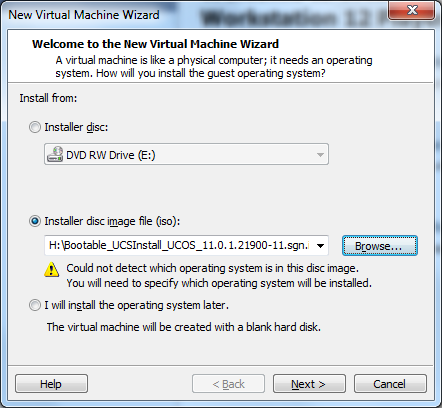
The final thing we'll do is tell the VM where to find a bootable CUCM install disk image. The first time the VM runs, it will boot from this disk image and install CUCM into itself. From then on, the VM will run CUCM. This is just like when you install any other operating system onto a real computer. In this sense, CUCM acts more like an operating system than a piece of software. If your CUCM disk image isn't bootable (most are only meant for upgrading existing systems) there are ways around that. Check the internet, including YouTube, for tutorials.
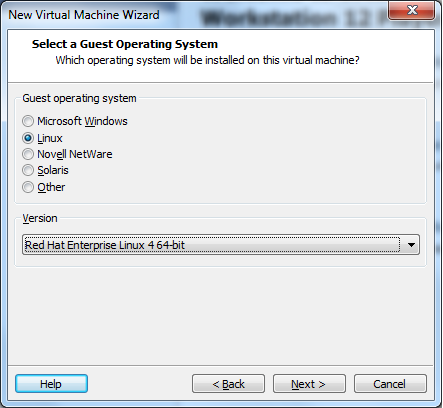
In this vein, VMware wants to know what kind of operating system is running inside of the VM. We'll say that it is some version of Red Hat Linux. This is a little white lie to cope with the fact that VMware doesn't have an option labeled CUCM. If you have a 64-bit machine, tell VMware that it is hosting the 64-bit version of Red Hat.
Table 3. VM Creation Options
VM Name
Guest Operating System
VM Disk Space
RAM
Network
CUCM Lab
Red Hat Enterprise Linux 4
80 GB
3 GB or so
Bridged
VM Creation Walkthrough
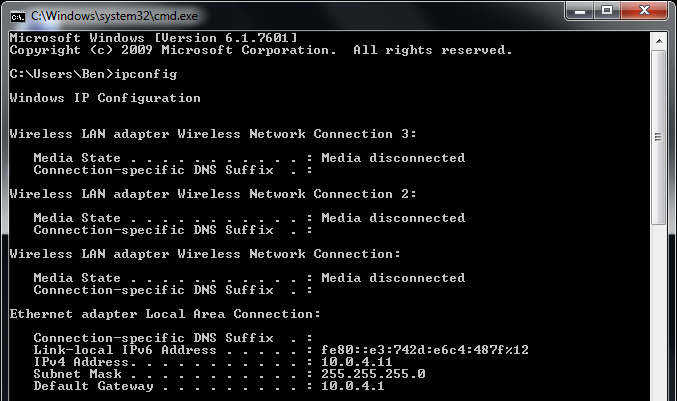
Test your Network Connection
The host computer should receive an IP address in the data VLAN from the DHCP server running on your lab router.
Run VMware
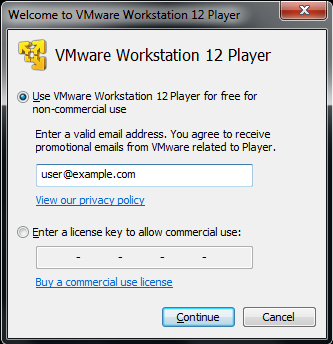
On its first run, you'll need to either give VMware player an e-mail address or a license key.
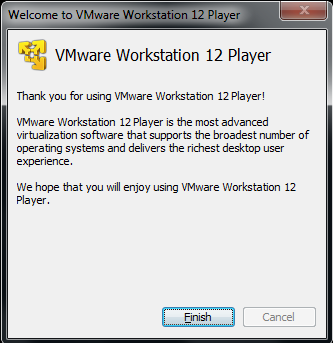
VMware Welcome
Just click finish.
The VMware Console
Choose "Create a New Virtual Machine."
New VM Wizard
Tell it where to find your bootable CUCM install DVD or image.
Guest Operating System
This is where we tell VMware to treat CUCM like it would a Red Hat operating system. I chose RHEL version 4 because it works for me. Match the 64- or 32-bit choice to your real hardware.
Name the VM
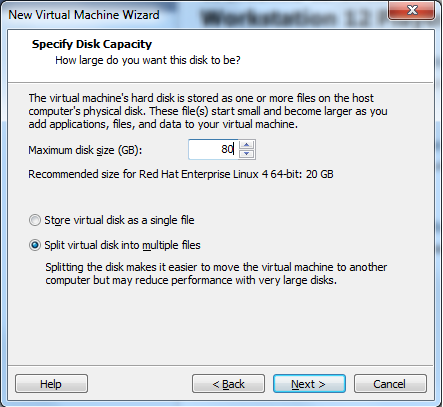
Size of the VM's Imaginary Disk
The VM's file system won't actually take up much space on your hard drive until it has contents. In fact, you can allocate more disk space than you actually have available. I'm using 80GB based on the published requirements for CUCM and some experimentation.
This is where you place limits on how much of your real machine is available for this virtual machine to use. Since our CUCM server won't have any real users, we can be pretty stingy, for example:
Ram
3 GB is fine
CPU
1 core is fine
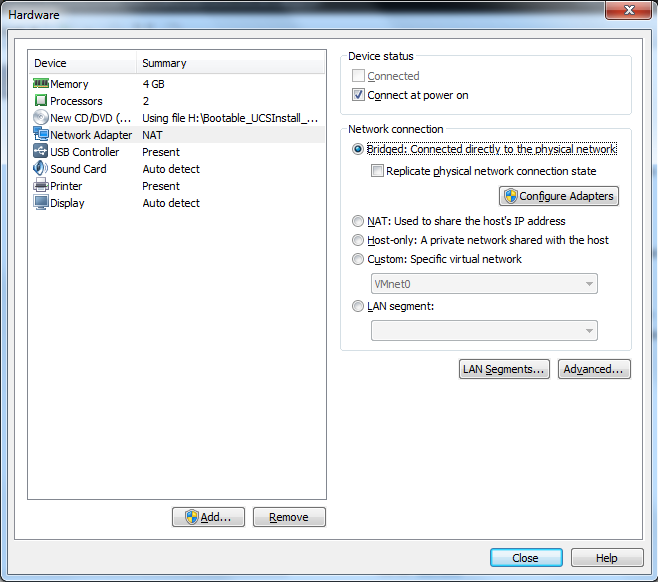
Bridge the Network
This shares the raw ethernet jack between the VM and the host computer without any NAT translation
Don't worry about an IP address here; that will be configured inside CUCM when it runs inside this VM.
Phase 3—Run the VM and Install CUCM Into It
When we created the VM, we told it to install an operating system into itself from the CUCM install disk / image on its first run. Now we'll "boot" that VM and walk through the CUCM installation process. From this point forward, it's as if we had purchased one of Cisco's rackmount computers, put the install disk in the DVD player, and turned it on for a fresh install. Our VM is pretending to be one of those Cisco computers. If you've ever installed Linux using a text interface, this will all look familiar.
To interact with the process running inside the VM, click in the window of the running VM. To escape back to your host computer, press the [ ctrl ] and [ alt ] keys together. VMware will remind you of this on the first occasion that it's relevant.
Table 4. CUCM Installation Options
Host Name
IP Address
Gateway
Console Login / Password
Security Password
Application User
cucmlab
10.0.4.5 /24
10.0.4.1
cucmroot / ciscoclass
ciscoclass
student / ciscoclass
CUCM Installation Walkthrough
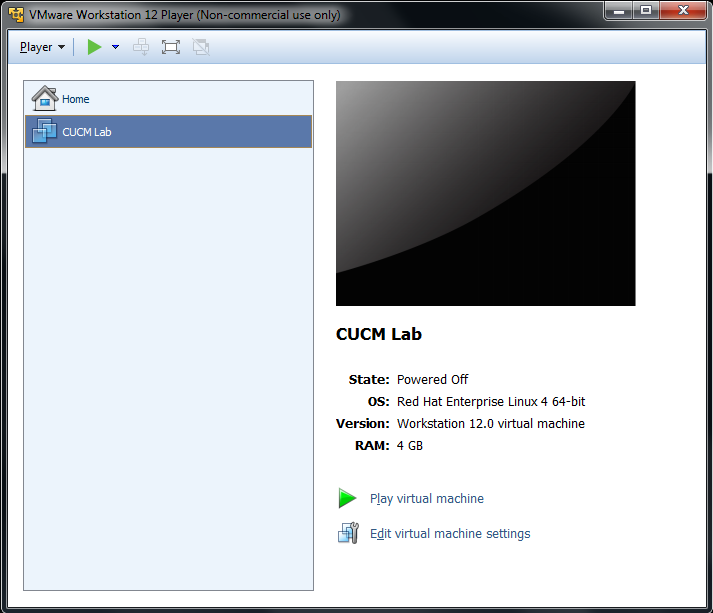
Play the VM
Select your "CUCM Lab" VM in the left pane and press "Play virtual machine" in the lower right.
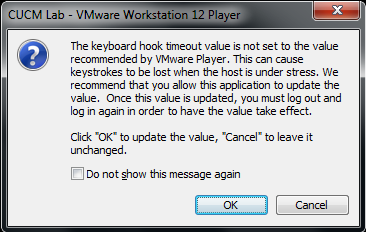
Deal with Warnings
You may get some warnings. This one tells about the possibility of the VM missing keystrokes.
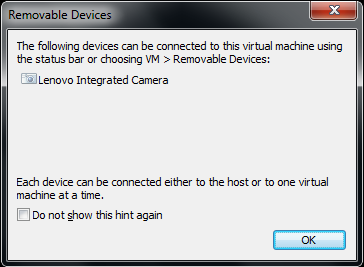
Deal with Feature Hints
Even if we wanted to use our computer's camera for our Jabber virtual phone, we certainly wouldn't use it for a CUCM server. Just click OK.
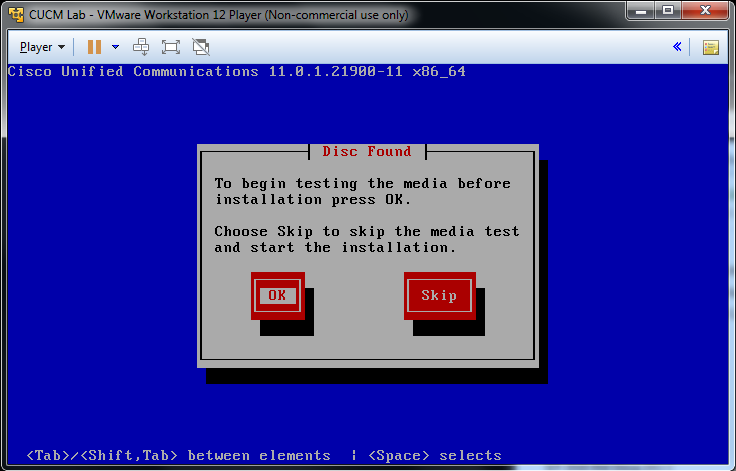
Optional Media Test
Now our VM is booting from the CUCM install disk. The CUCM install program will offer to check itself for readability. This can be wise if we're using a real DVD. If we're using a disk image file where we've already verified the checksum after downloading it from Cisco, it's probably a waste of time. Cisco's website makes file sizes and MD5 checksums visible when your mouse hovers over an item in the download center (JavaScript required).
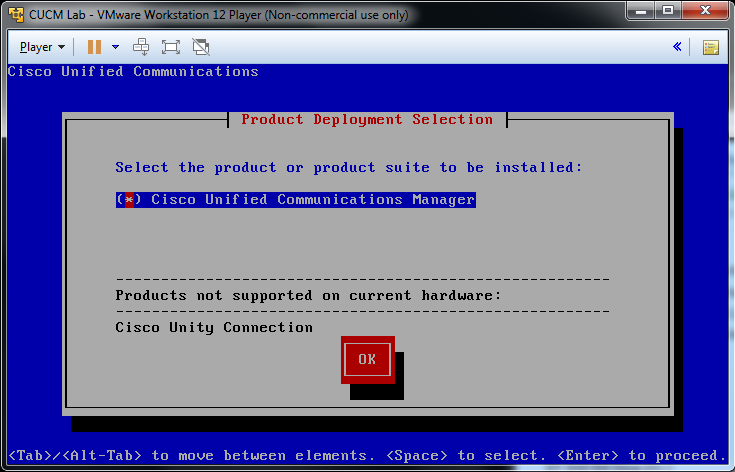
Choose to Install CUCM
Unity Connection requires about twice as much disk space as CUCM and may not always be an option on this screen, even though both ship on the same install media. Tab to the OK button and hit [ return ].
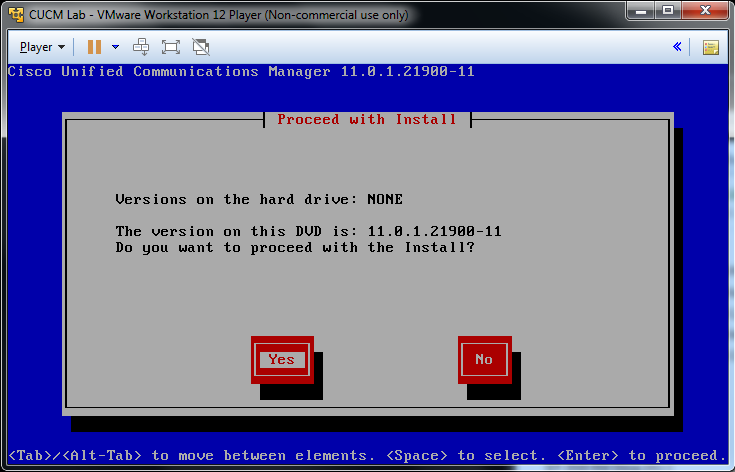
Yes, Proceed with Install
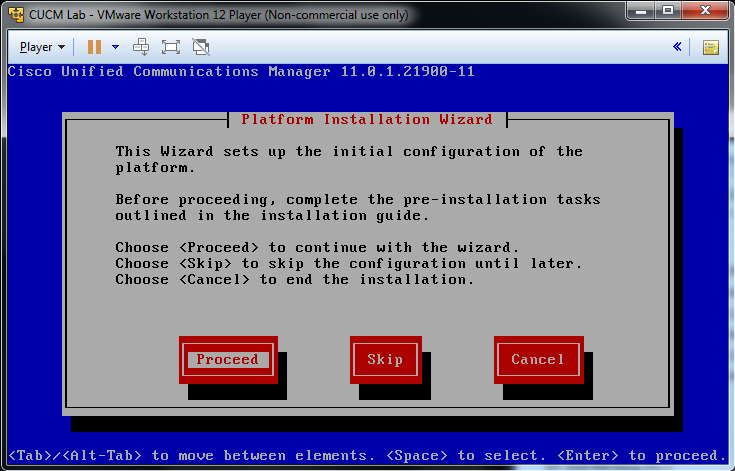
Install Wizard Welcome
Proceed.
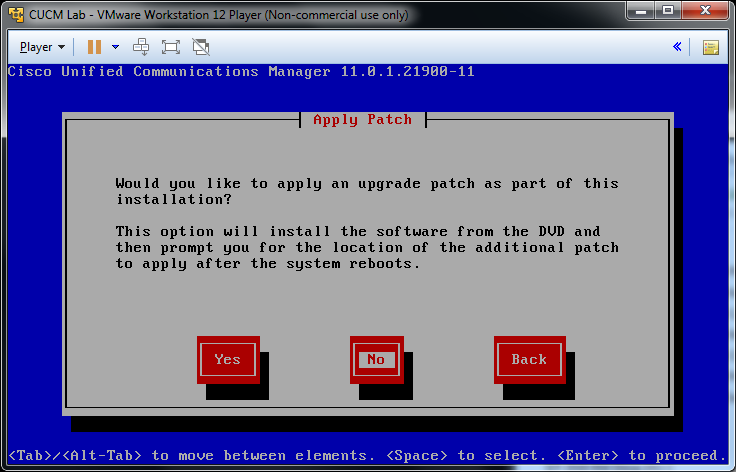
Upgrade Patches
If you had an extra upgrade file, you could ask that it be run after the install.
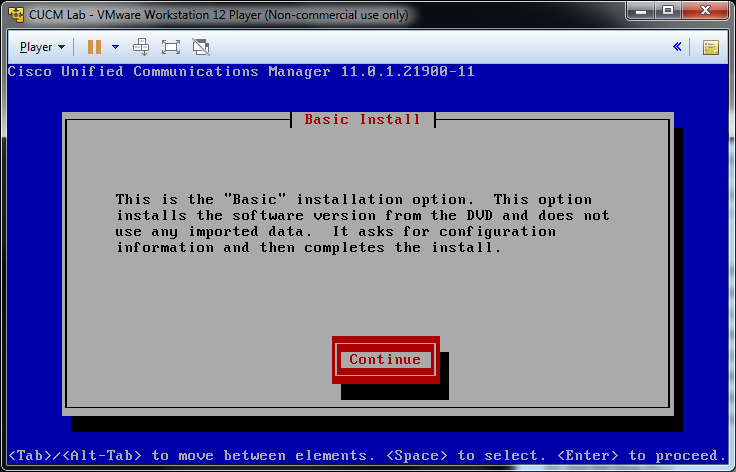
Continue
Select a Timezone
This is for the server. Your offices and phones can be in many different timezones. Tab to the OK button and hit [ Enter ].
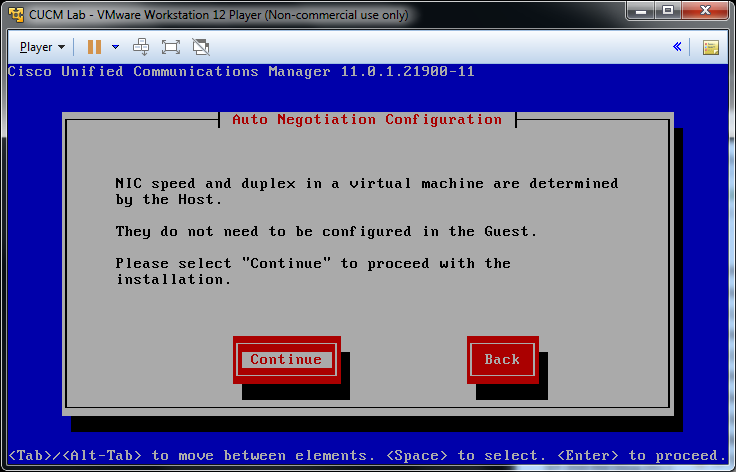
NIC Autoconfig
Just choose Continue.
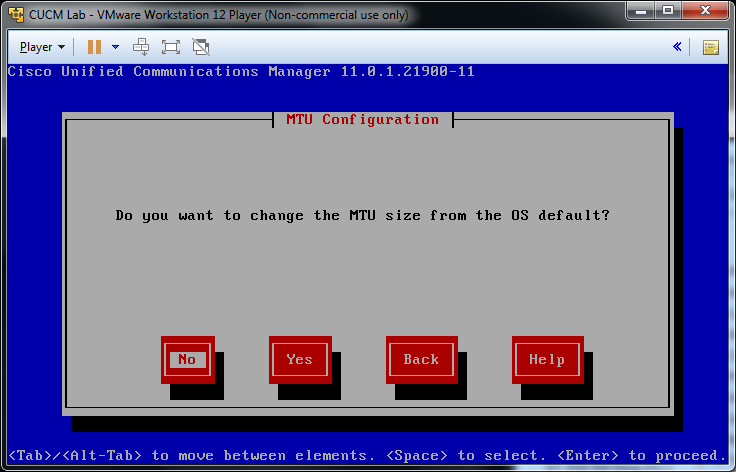
MTU Size
Just say no.
Don't Use DHCP
CUCM is a server and should have a static IP address.
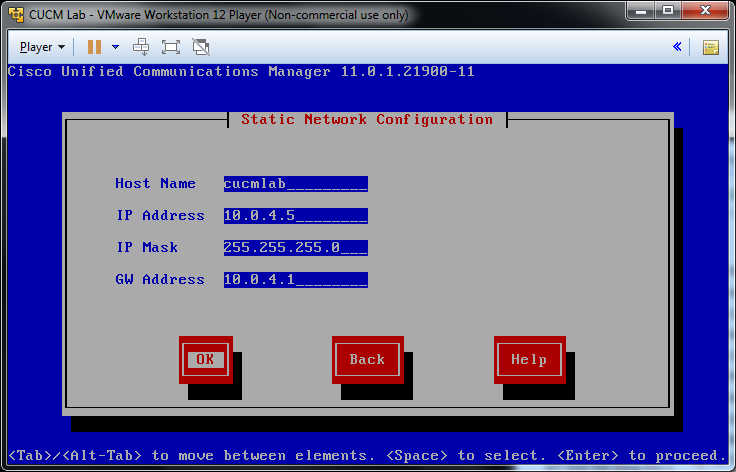
Give CUCM an IP Address
We'll put our CUCM server "cucmlab" at 10.0.4.5/24 with a default gateway at 10.0.4.1.
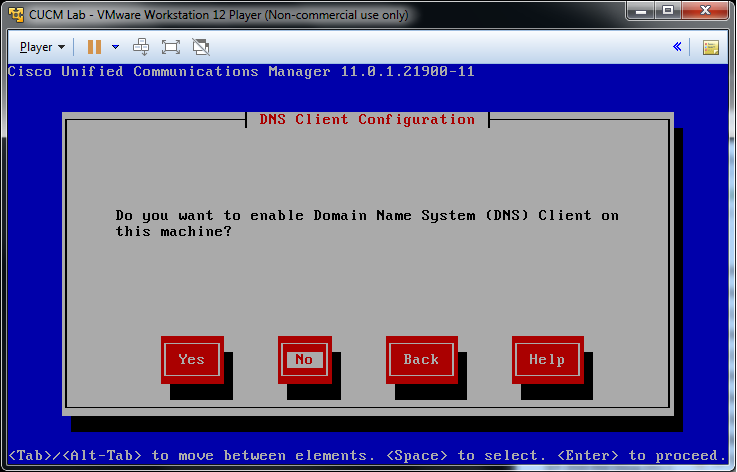
Don't Enable a DNS Client
One of the first things we'll do once CUCM is running is to change all name configurations within it to IP addresses. We don't want the phone system unusable just because the DNS server is unreachable.
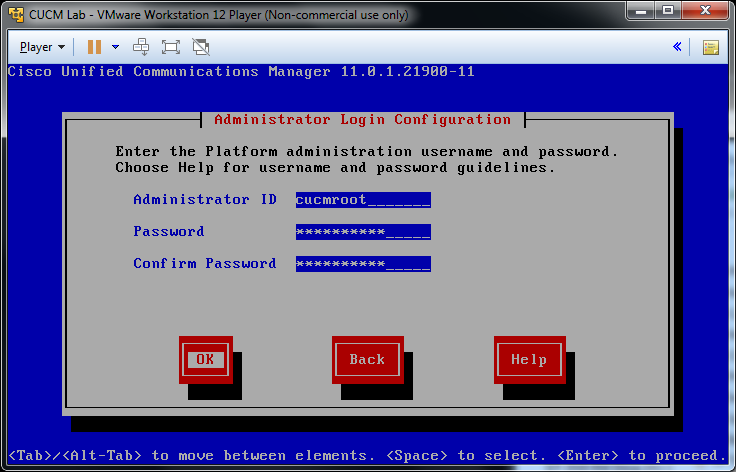
Admin Login
This is for the OS Administration interface within CUCM and for logging into the CUCM console. Use a login of "cucmroot" with a password of "ciscoclass" and promise never use anything so predictable on a production system.
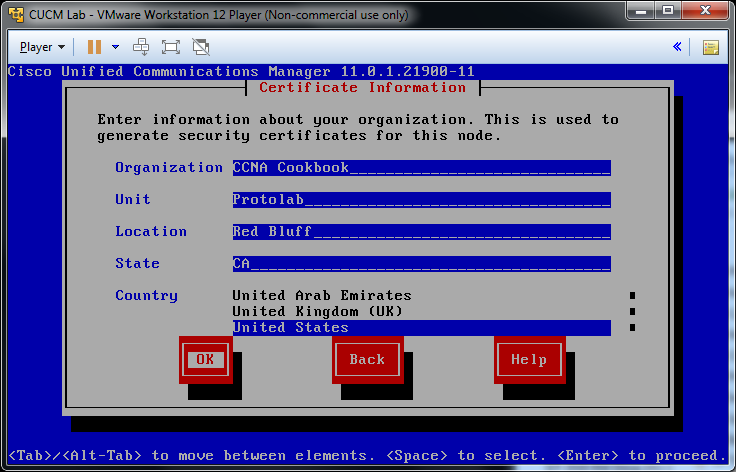
Create a Certificate
This is where you'll create a self-signed certificate to enable https: encryption so CUCM can be securely administered through a web browser.
This is the First (only) Node in the Cluster
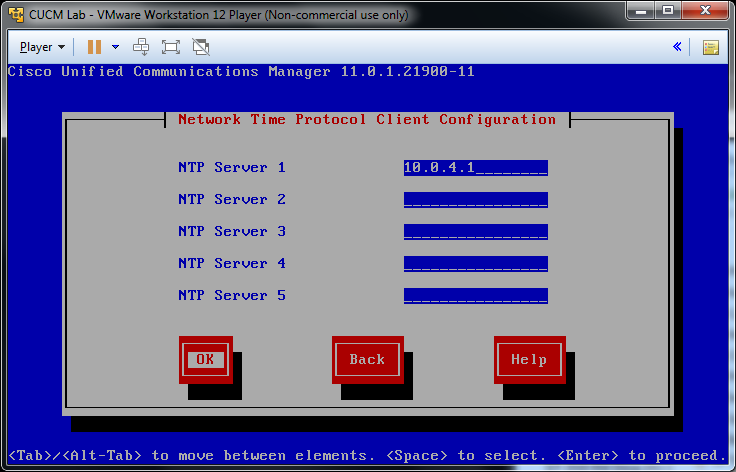
NTP Source
Point to our router at 10.0.4.1 as a network time server. We earlier entered the command "ntp master" on the router to enable that functionality.
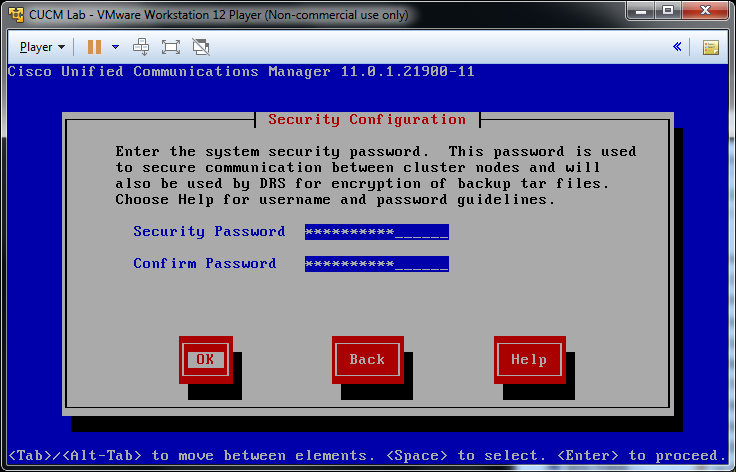
System Security Password
Use "ciscoclass" here, just like everywhere else.
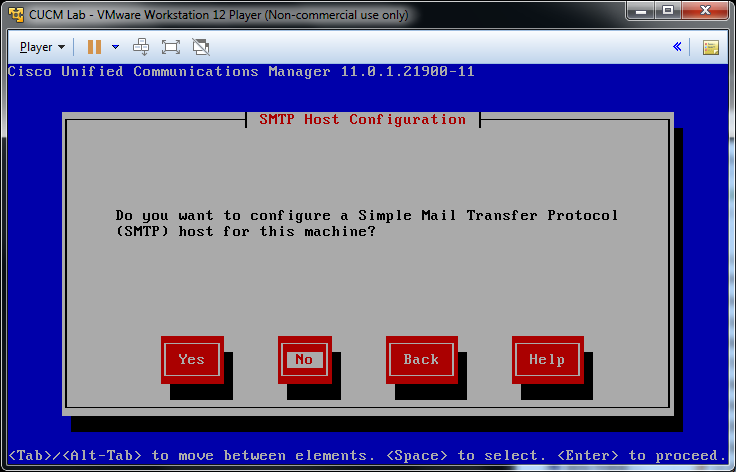
No SMTP
We really don't need this lab CUCM server to be sending e-mails to anyone.
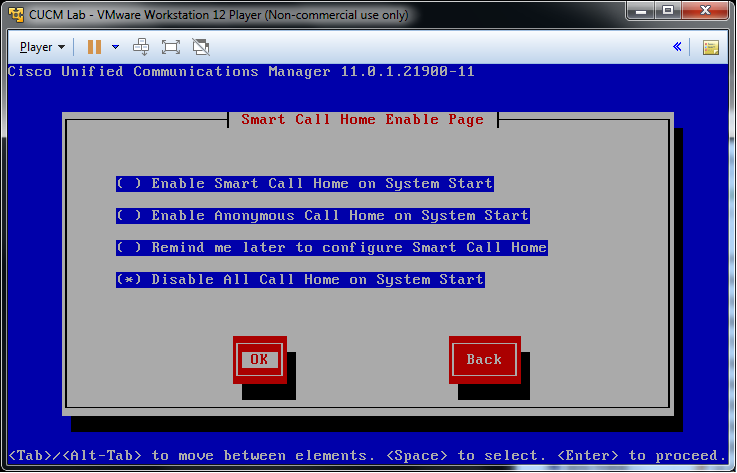
Disable Call Home
There's nothing we want our CUCM server to say to Cisco and our prototyping lab doesn't connect to the internet anyway. Tab down to "Disable All call Home…" and hit the space bar. These are radio buttons, so that'll turn off the other options.
This might be a good time to check YouTube for clips from "WKRP in Cincinatti" about "phone cops."
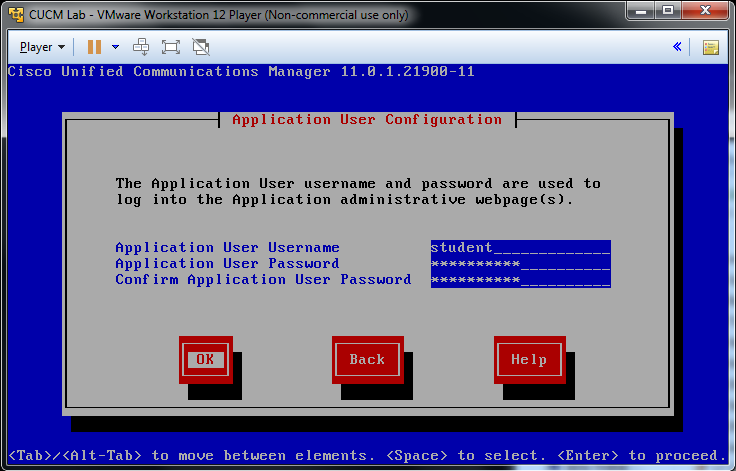
Application User
This user account will be where we spend most of our time. It gives us access to almost all of the administration interfaces, allowing us to add phones and users. Use a login of "student" and a password of "ciscoclass"
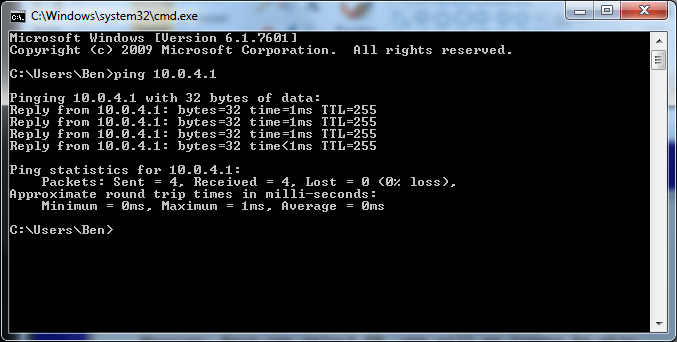
Test The Networking
We've now entered all of our configurations. This is a good time to jump back to our host and test the network before giving the install a final OK to start. Use [ ctrl ] and [ alt ] together to switch back to Windows and ping the default gateway ( 10.0.4.1 ) in a DOS prompt ( "cmd" at the start menu search bar ).
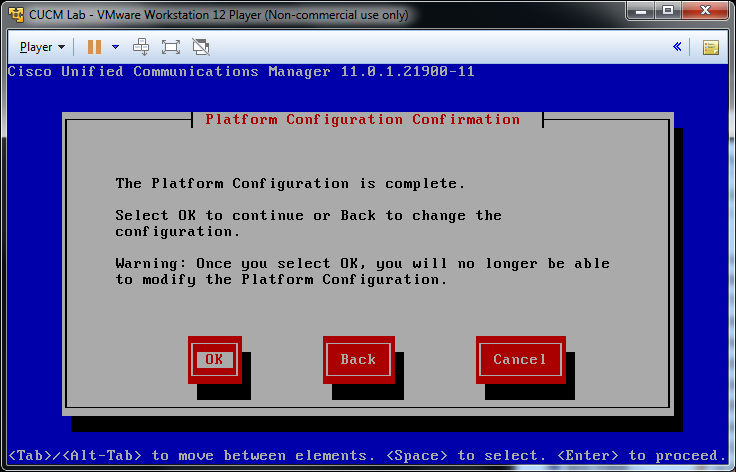
Platform Config Complete
Press OK to continue.
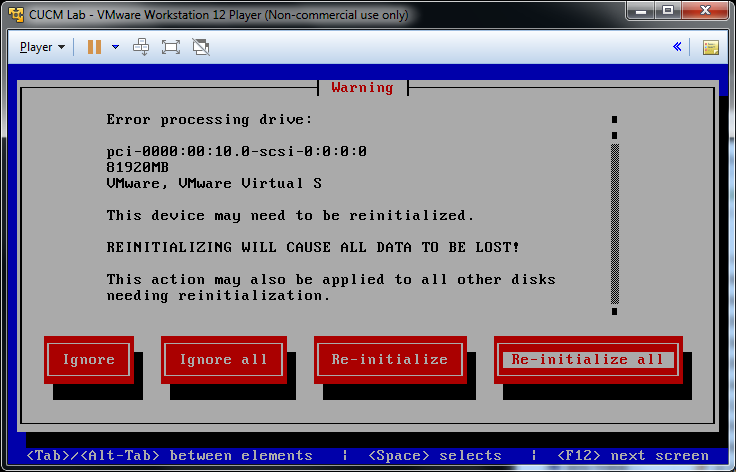
Initialize the Virtual Disk
The warning message is terrifying, but we're only formatting an imaginary disk inside a virtual machine. Choose "Initialize All."
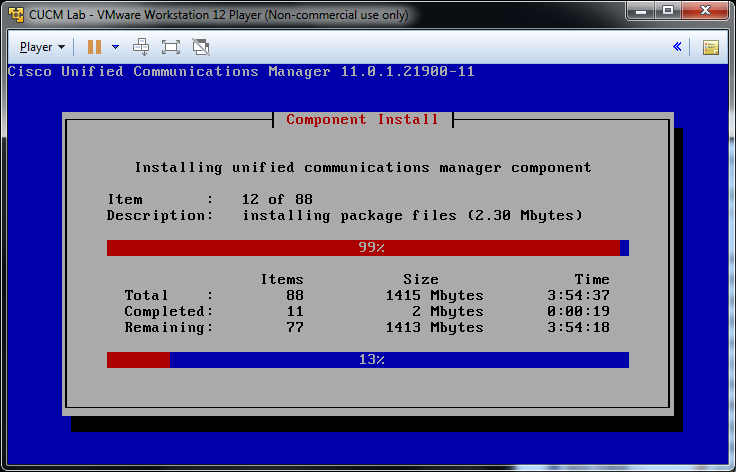
The Installer Runs
Go away while it works.
And Runs…
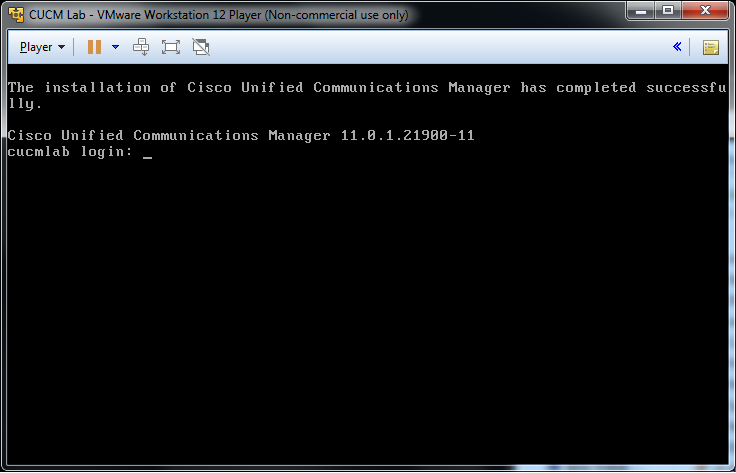
Success
When the installation finishes, the VM will reboot and run the CUCM that it now contains. You'll see a console login prompt in your VM window. You're unlikely to ever log into this screen; CCNA focuses on the web interface. If you want to shut down your host computer, lab 8-1 shows you how to cleanly shut down CUCM within the VM first.